Gmailの即時通知設定方法
「—@gmail.com」宛のメールを即受信することが可能になります。
Gmailの転送機能を利用しますので、電池の消耗ありません。*即時通知には転送アドレスが必要ですので下記で発行後、設定下さい。
Gmailの転送機能を利用しますので、電池の消耗ありません。*即時通知には転送アドレスが必要ですので下記で発行後、設定下さい。
↓
即時通知設定方法
難しいですが頑張ってください!何度か読まないとわからないかもしれません…m(_ _)m
1. Webブラウザ(safari、デコブラウザ等)を起動し、Gmailにログインする。
別タブで開くと設定しながら作業出来ます!
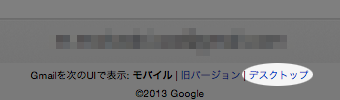
スマホからログインすると以下のページが表示されます。
この場合、ページ下部の「デスクトップ」というリンクをタップしてください。
↓
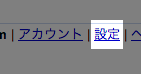
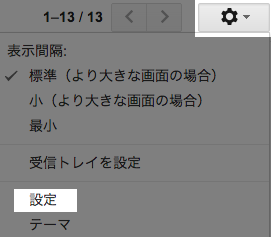
2. Gmailの設定画面を開く
設定ページへのリンクは画面の右上にあります。
スマホの場合
PCの場合
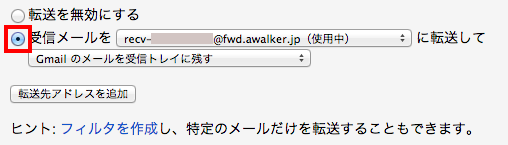
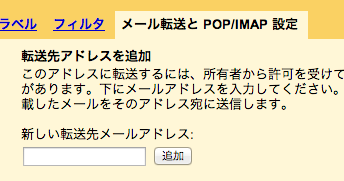
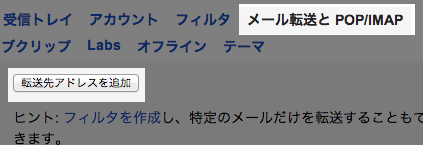
3.「メール転送とPOP/IMAP設定」を開き、転送アドレス(recv-**-******@fwd.awalker.jp)を入力する。
>> 転送アドレス発行
スマホの場合
PCの場合
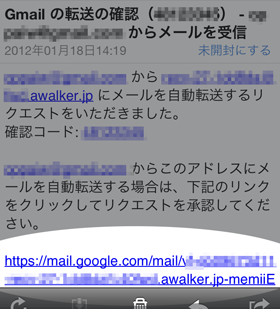
4. アドレス確認メールが届くので、内容を確認してリンクをタップする。
※迷惑メールに振り分けられる事もありますので、ご注意ください。
5. 再度、Gmailの設定画面にアクセスし、転送メールアドレスを有効にして「変更を保存」をタップする。
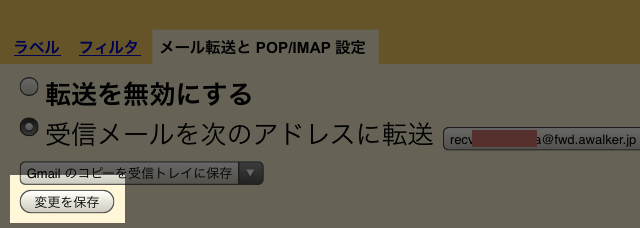
【注意】
「変更を保存」が画面最下部にある場合もあります。
「変更を保存」をタップしていない人が非常に多いので、確実にタップしてください。
以上で設定が完了します。
※転送が無効になっていると転送されません!